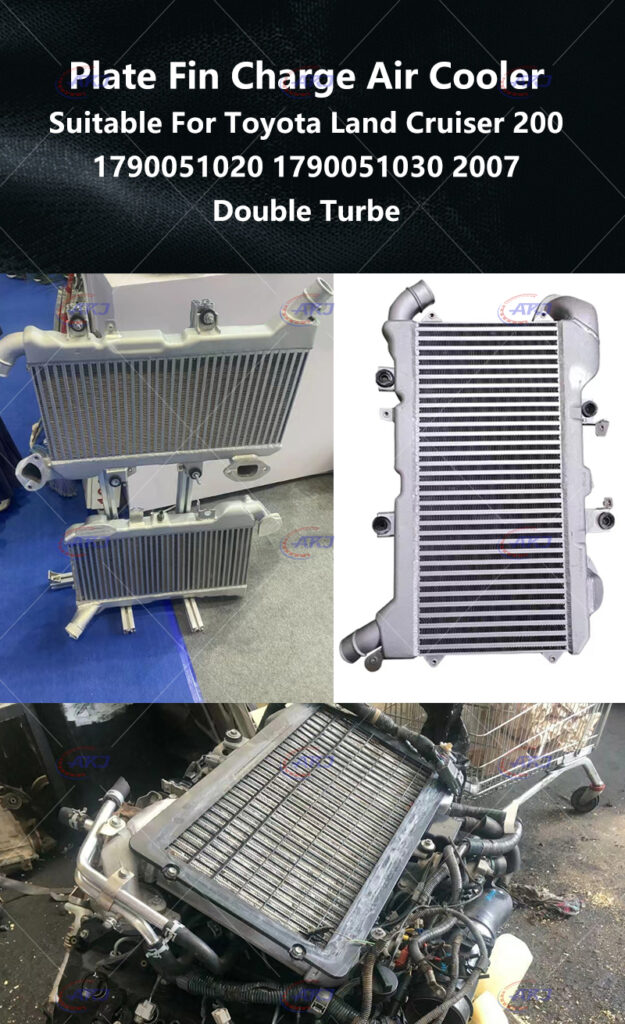
Panqi-AKJ Toyota intercooler twin-turbo LC200 series, using high-quality all-aluminum technology and plate-fin technology, has been improved and optimized on the basis of the original intercooler, and supports customized services OEM number: 1790051020 1790051030 2007
For those seeking to enhance the performance of their Toyota LC200, upgrading the intercooler accessories is a popular modification. Upgraded intercoolers, charge air coolers, and other cooling components can significantly improve the vehicle’s power output and efficiency. In this comprehensive guide, we will walk you through the process of replacing OEM parts with high-end modified intercooler accessories, allowing you to unlock the full potential of your Toyota LC200.
Assess Your Modification Goals:
Before embarking on the journey of upgrading your intercooler accessories, clearly define your modification goals. Determine whether you’re looking for increased power, improved cooling efficiency, or both. This will help you choose the right intercooler and associated components to achieve your desired results.
Research High-End Intercooler Accessories:
Thoroughly research and explore the market for high-end intercooler accessories suitable for your Toyota LC200. Look for reputable manufacturers known for producing quality and performance-oriented products. Consider factors such as design, construction materials, cooling efficiency, and compatibility with your vehicle.
Consult with Experts:
Seek advice from experienced professionals or automotive enthusiasts who have expertise in modifying Toyota LC200 intercooler systems. They can provide valuable insights, recommend specific brands or products, and offer guidance on the installation process.
Choose the Right Intercooler:
Select an intercooler that is designed specifically for your Toyota LC200 model and engine configuration. Ensure that it offers an improved cooling capacity, efficient heat dissipation, and minimal pressure drop. Opt for intercoolers with larger core sizes, advanced fin designs, and durable construction materials for optimal performance.
Gather the Necessary Tools and Equipment:
Before beginning the replacement process, gather all the necessary tools and equipment. This may include wrenches, sockets, screwdrivers, pliers, and a torque wrench. Additionally, ensure you have a safe and clean working environment with proper lighting and ventilation.
Follow the Manufacturer’s Instructions:
Carefully read and follow the manufacturer’s instructions provided with the high-end intercooler accessories. These instructions will guide you through the installation process and help you avoid any potential pitfalls or errors. If any doubts arise during the installation, consult the manufacturer’s customer support or seek professional assistance.
Replace OEM Parts with High-End Accessories:
Start by disconnecting the battery to ensure safety during the installation process. Remove the OEM intercooler and associated components, following the necessary steps outlined in the manufacturer’s instructions. Install the high-end intercooler and connect all the necessary hoses, clamps, and sensors according to the provided guidelines. Ensure a secure and proper fitment before proceeding.
Test and Fine-Tune:
Once the new intercooler accessories are installed, start the vehicle and perform a thorough inspection for any leaks, unusual sounds, or vibrations. Monitor the coolant and intake air temperatures to ensure they stay within the desired range. Fine-tune the intercooler system, if necessary, to optimize performance and ensure everything is functioning as intended.